
An outdoor deck is the heart of summer entertainment, but constant exposure to UV rays, rain, and foot traffic takes a heavy toll. Homeowners often struggle to evaluate the true condition of their wood structures. If your outdoor living space is looking weathered, you must know how to tell if your deck needs staining, sealing, or a total structural overhaul. Making the wrong choice can lead to wasted money or, worse, safety hazards. This comprehensive guide will help you diagnose your deck’s health, perform simple structural tests, and choose the correct restoration method.
Understanding the unique requirements of wood maintenance ensures your deck stays beautiful and structurally sound for decades. Let’s dive into the core differences between staining, sealing, and replacement so you can confidently protect your investment.
Staining vs. Sealing vs. Replacement: The Core Differences
Before testing your wood, it is crucial to understand what each maintenance or construction phase entails. While people often use the terms interchangeably, staining and sealing serve different purposes, and replacement is an entirely different tier of renovation.
- Deck Sealing: Sealing applies a clear, protective topcoat that prevents moisture penetration. It locks out water but does not offer significant protection against UV rays, meaning your wood will still naturally gray over time.
- Deck Staining: Staining adds pigment to the wood alongside protective resins. It protects against moisture while shielding the wood from UV degradation, altering or enhancing the wood’s natural color.
- Deck Replacement: This structural process involves tearing down compromised boards, joists, or the entire framing and rebuilding with new pressure-treated lumber, hardwood, or composite materials.
How to Tell If Your Deck Needs Staining or Sealing
Determining whether your wood requires a fresh coat of finish or a simple moisture barrier depends heavily on aesthetics and current wear. If you want to know how to tell if your deck needs staining, look closely at the color fading and surface fibers.
The Telltale Signs Your Deck Needs Staining
When wood loses its color and begins to look washed out, dry, or silver-gray, the pigments from the previous stain have broken down. UV radiation destroys wood lignin, leading to surface degradation. If the wood looks structurally intact but has lost its rich tone, a thorough cleaning and restaining will revive it.
The Flash Splash: The Water Droplet Test
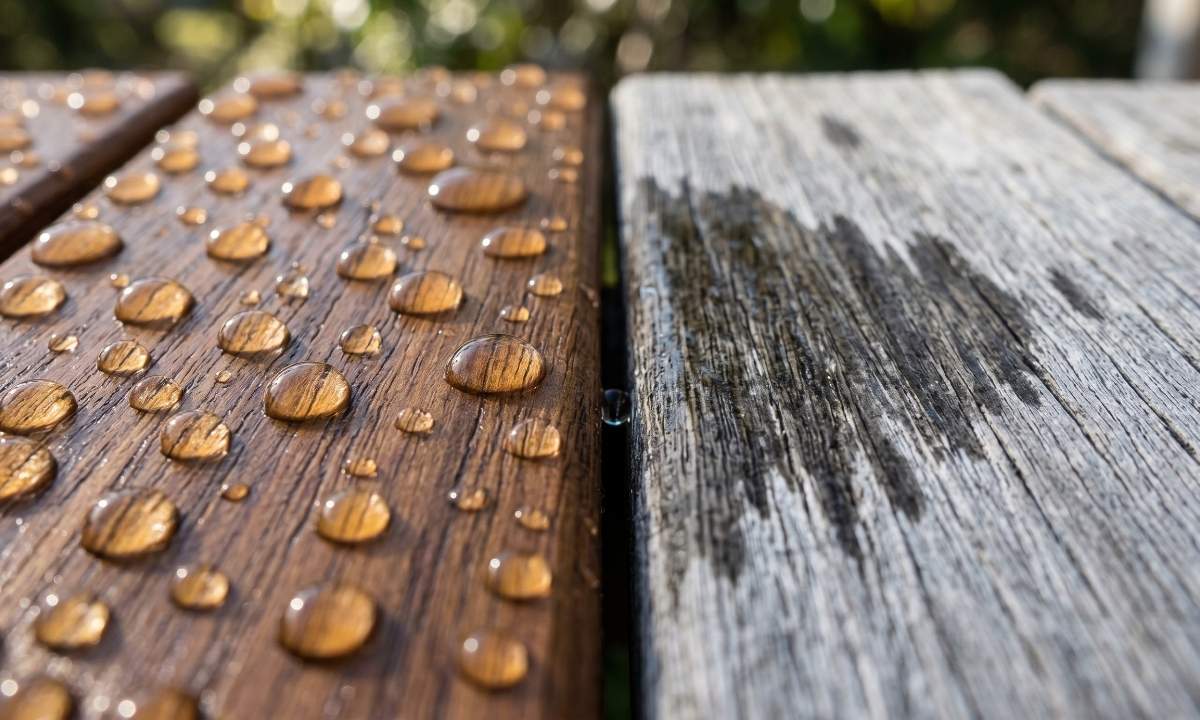
The absolute best way to check if your deck needs sealing or staining is the water droplet test. Pour a few tablespoons of water onto various areas of your deck, particularly high-traffic zones and spots fully exposed to the sun. Watch how the wood reacts over the course of five minutes:
- Water beads up: Your current sealer or stain is still doing its job. No maintenance is required yet.
- Water soaks in immediately: The wood pores are completely open. Your deck is vulnerable to rot, cracking, and warping, meaning it requires immediate sealing or staining.
- Water soaks in slowly (1–2 minutes): Your protection is wearing thin. You should plan to prep and treat the surface within the next few months.
Evaluating Wood Decay and Damage
Surface appearance is only one part of the equation. You must also evaluate the physical integrity of the timber to ensure it hasn’t progressed past the point where a simple stain can save it.
+————————–+————————————————+———————————————-+
| Diagnostic Feature | Needs Staining or Sealing | Needs Partial/Full Replacement |
+————————–+———————————————–+———————————————-+
| Moisture Interaction | Absorbs water but remains firm | Stays damp, feels spongy or soft |
+————————–+———————————————–+———————————————–+
| Surface Cracking | Fine hairline checks and cracks | Deep structural splits through |
| the entire board thickness |
+————————–+———————————————–+———————————————–+
| Structural Fasteners | Intact, slightly raised screws | Rusting through, pulling free |
| from rotted joists below |
+————————-+————————————————+———————————————-+
| Color and Texture | Faded color, silver-gray patina | Black mold stains, fuzzy wood |
| texture, crumbling edges |
+————————-+————————————————+———————————————–+
| Insect Signatures | Minimal surface spiderwebs | Clean, hollow boreholes with |
| fine sawdust (frass) present |
+————————-+————————————————+———————————————–+
Checking for Splitting and Cracking
As wood expands and contracts with shifting weather patterns, small surface cracks called “checks” will naturally develop. These are normal and can be filled or covered with quality stains. However, if you notice deep, wide splits that run the entire length of a board or split the wood around fasteners, the board’s structural integrity is compromised.
Identifying Soft Spots and Wood Rot
Wood rot is a silent killer of outdoor structures. Take a flathead screwdriver or a pocketknife and press the tip firmly into areas that frequently stay wet, such as boards close to the ground, near stairs, or directly under planter boxes. If the tool sinks effortlessly into the wood without resistance, or if the timber crumbles like wet cardboard, you are dealing with active wood rot. Rotten wood cannot be saved by stain; it must be cut out and replaced.
The Ultimate Checklist for Structural Deck Integrity
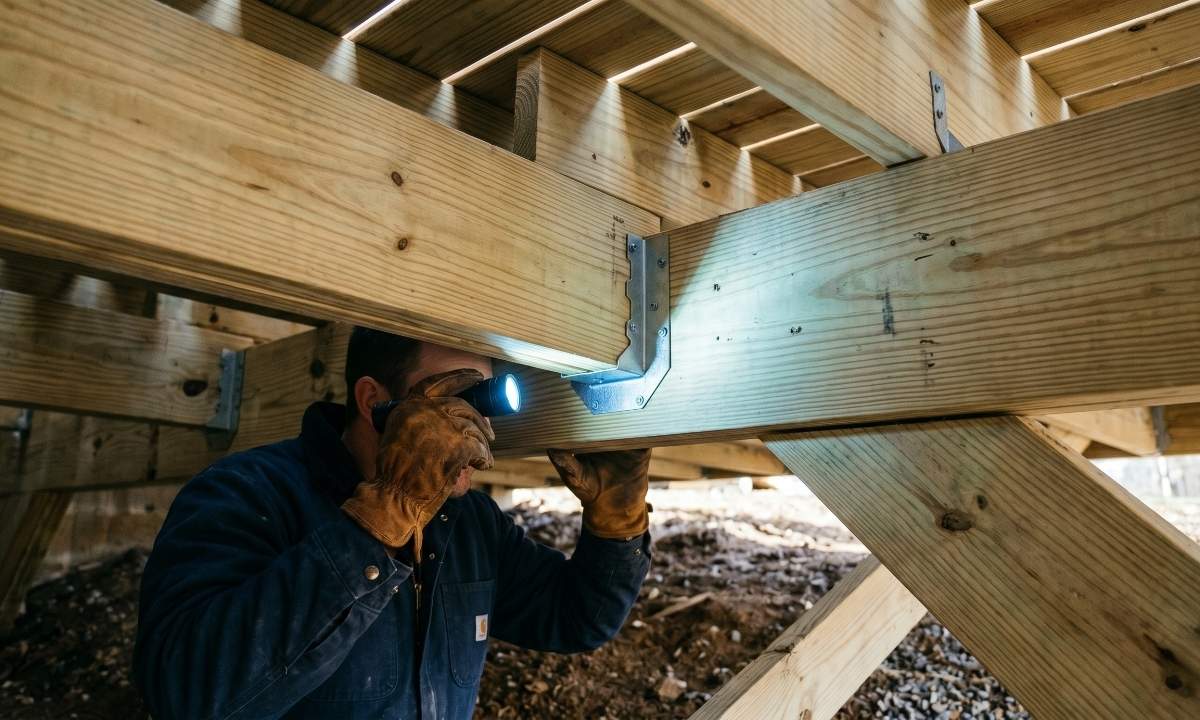
You cannot determine how to tell if your deck needs staining or a full replacement without looking underneath the surface. The safety of your family depends on the integrity of the hidden framing underneath your deck boards.
Inspecting the Ledger Board and Flashing
The ledger board secures your deck directly to your home’s framing. It is the most common failure point for residential decks. Look closely at the metal or plastic flashing installed above the ledger board. If the flashing is missing, rusted, or incorrectly installed, water will seep behind the board, rotting both your deck infrastructure and your home’s rim joist. Look for water stains or soft wood in your basement or crawl space adjacent to the deck.
Examining Joists, Beam Support, and Posts
Get underneath your deck with a bright flashlight. Inspect the vertical support posts that anchor into the ground or concrete footings. Check the horizontal beams and joists supporting the deck floorboards. Look for sagging, twisting, or extensive mold growth. If the joists are structurally sound but the top surface is slightly weathered, you can safely proceed with a surface restoration. If the joists are soft or bowing, structural remediation is mandatory.
Assessing Connection Hardware and Fasteners
A deck is only as strong as the metal connectors holding it together. Check the condition of the joist hangers, post-to-beam connectors, bolts, and screws. If you find widespread corrosion, rusted-through nails, or fasteners that are pulling out of the wood because the underlying timber has softened, a simple aesthetic stain will not fix the issue. You must replace the rusted hardware and compromised wood immediately.
When a Complete Deck Replacement is Mandatory
While cleaning and coating can work wonders, there comes a time when continuing to repair an old structure is a waste of money and a serious safety hazard.
The 10-to-15-Year Rule for Pressure-Treated Wood
Standard pressure-treated pine decks have an expected lifespan of roughly 10 to 15 years, depending on maintenance history and regional climate conditions. If your deck has crossed the 15-year mark and is showing widespread signs of cracking, warping, and loosening fasteners, it is likely reaching the end of its functional life cycle. Investing thousands of dollars into sanding and premium stains on an aging structural foundation is poor financial strategy.
Calculating the Total Cost of Sectional Repairs
If you only have one or two damaged deck boards, unscrew them and install new pieces of matching lumber. However, if more than 30% of your deck boards are rotted, split, or severely warped, or if the underlying framing requires extensive engineering fixes, a complete rebuild becomes the more cost-effective option. Sectional repairs on an old deck result in an unsightly, mismatched appearance and fail to address systemic structural wear.
Step-by-Step Guide to Prep and Stain Your Deck
If your inspection reveals that your deck framing is perfectly healthy and the wood successfully passes the water droplet test by absorbing water, your structure is a prime candidate for a beautiful restoration. Follow these steps for professional-grade results.
Step 1: Deep Cleaning and Stripping
Never apply new stain over dirty, mildewed, or peeling old finishes. Apply a high-quality deck cleaner or wood stripper to break down old finishes and kill mold spores. Scrub the surface thoroughly with a stiff-bristled brush. If you use a pressure washer, keep the pressure below 1,500 PSI and hold the wand at least 12 inches away from the surface to avoid gouging and scarring the soft wood fibers.
Step 2: Brightening the Wood
After rinsing away the cleaner, apply a wood brightener formulated with oxalic acid. This crucial, often-overlooked step neutralizes the pH of the wood after cleaning, opens up the wood grain, and restores the natural golden hue of the timber. Let the brightener sit for 10–15 minutes, then rinse it off completely.
Step 3: Sanding for a Flawless Finish
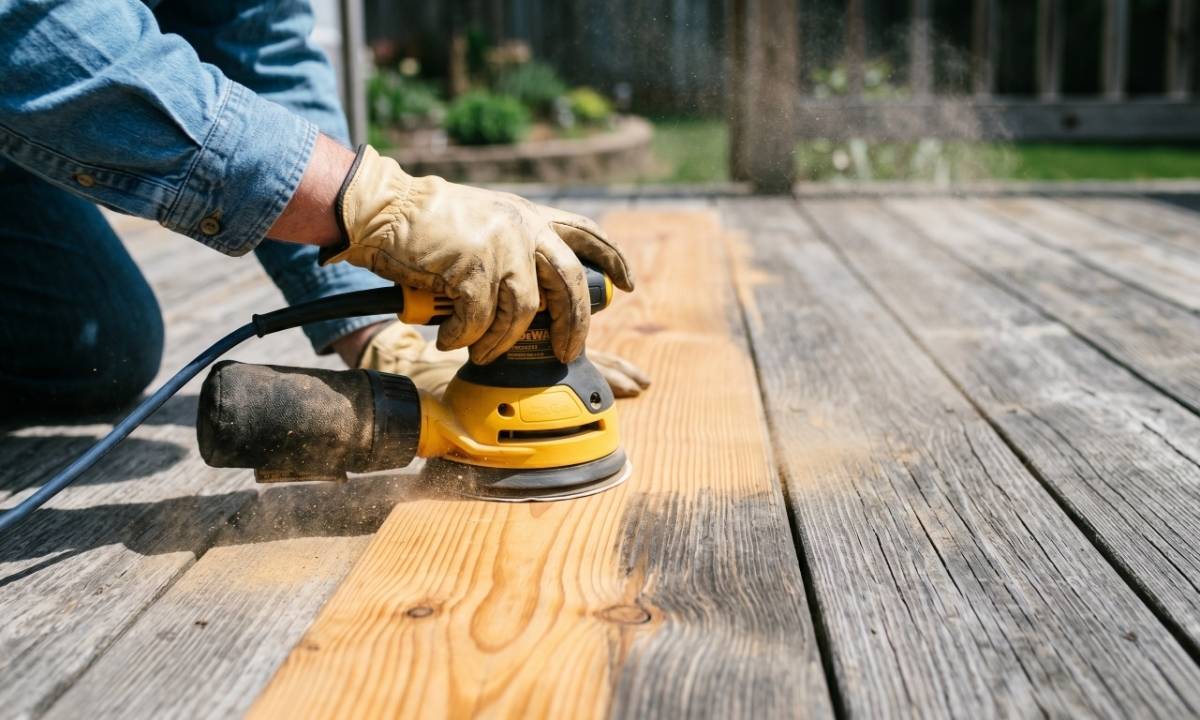
Allow the deck to dry completely for at least 48 hours. Once dry, use an orbital sander equipped with 60-to-80-grit sandpaper on the floorboards and 100-to-120-grit sandpaper on the handrails. Sanding removes fuzzy wood fibers raised during washing, eliminates remaining splinters, and creates an perfectly smooth surface that absorbs stain evenly. Vacuum or blow away all sanding dust before coating.
Step 4: Selecting the Right Coating Product
Choose your coating based on the condition of the timber and your aesthetic preferences:
- Clear Sealers: Excellent for brand-new, expensive hardwoods like Ipe or cedar where you want the natural grain to show completely. Requires annual reapplication.
- Semi-Transparent Stains: Contain light pigments that tint the wood while letting the grain remain visible. Provides fantastic UV protection and lasts 2–3 years.
- Solid Stains: Look like paint and completely hide the wood grain while showing the texture. Ideal for older, weathered decks with mismatched boards or deep imperfections. Lasts 3–5 years.
Step 5: Masterful Application Techniques
Check the weather forecast to ensure you have a window of 48 hours without rain, with temperatures remaining between 50°F and 90°F. Apply the stain using a natural bristle brush or a dedicated deck stain roller pad. Work on 2–3 boards at a time across their entire length to avoid unsightly lap marks. Back-brush any pooling product into the wood pores to ensure an even, uniform layer.
Choosing Your Next Move: Professional vs. DIY
Tackling a deck maintenance project requires an honest assessment of your available time, physical ability, and tool inventory.
When to Take the DIY Route
If your deck is structurally sound, requires minimal board replacement, and simply needs a good wash, sand, and stain, it makes an excellent weekend DIY project. You can easily rent pressure washers or commercial floor sanders from local home improvement stores. Taking the DIY approach saves significantly on labor costs and gives you complete control over product selection.
When to Call the Professionals at Caleb’s Creations
Structural work should never be a guessing game. If your inspection reveals sagging joists, a rotted ledger board, unstable railings, or widespread wood decay, it is time to hire licensed professionals. The expert team at Caleb’s Creations possesses the specialized engineering knowledge, structural permits, and heavy machinery required to safely repair or completely replace your outdoor living space. Hiring professional contractors ensures your new deck meets modern local building codes, maximizes your property value, and offers a bulletproof warranty.
Frequently Asked Questions
Can you stain over a dirty or damp deck?
No, you should never apply stain to a dirty or wet deck. Moisture trapped inside the wood pores will prevent the stain from adhering correctly, leading to rapid bubbling, peeling, and flaking within weeks. Dirt, pollen, and mold spores will become permanently trapped beneath the finish, causing dark discoloration and accelerating wood rot beneath the surface. Always ensure the wood is clean and has dried for at least 48 continuous hours after washing before applying any coatings.
How often should a wooden deck be sealed or stained?
As a general rule of thumb, clear sealers should be reapplied every 1 to 2 years, semi-transparent stains every 2 to 3 years, and solid stains every 3 to 5 years. High-traffic areas, surfaces with direct, unshaded southern sun exposure, and decks surrounding swimming pools or hot tubs will require more frequent maintenance. Performing the annual water droplet test is the most accurate way to establish a customized maintenance schedule for your unique outdoor environment.
Is it better to use a roller, sprayer, or brush to apply deck stain?
A combination approach yields the finest results. You can use a roller or an airless sprayer to quickly distribute the stain across large flat sections of floorboards, but you must immediately follow behind with a high-quality paintbrush. This technique, known as “back-brushing,” manually forces the stain deep into the wood pores, evens out puddles, runs, and drips, and ensures a uniform finish that won’t peel prematurely.
Can I change a solid stain back to a semi-transparent stain?
Switching from a solid stain back to a semi-transparent stain is an incredibly labor-intensive process, but it is possible. You will need to apply heavy-duty chemical strippers multiple times to dissolve the thick acrylic layer of the solid stain, followed by aggressive, deep machine sanding down to completely bare, fresh wood fibers. If the wood is older and heavily weathered, it may not absorb a semi-transparent stain evenly, making a fresh coat of premium solid stain the more practical choice.
Conclusion: Protect Your Outdoor Investment
Learning how to tell if your deck needs staining, sealing, or full replacement keeps your outdoor living area beautiful and safe. Consistently monitoring moisture absorption with the water droplet test, inspecting underneath for wood rot, and checking structural fasteners will help you identify small issues before they escalate into incredibly costly structural emergencies. Whether your deck requires a simple afternoon cleanup, a rich new coat of protective semi-transparent stain, or a complete modern structural rebuild, taking proactive action preserves your home’s equity and provides peace of mind.
Don’t wait for a broken board or structural failure to compromise your backyard enjoyment. If you are uncertain about the structural safety of your deck or want a flawless, long-lasting professional finish, contact Caleb’s Creations today to schedule an expert comprehensive deck evaluation and structural consultation!