


Every DIY painter hits the same wall – literally. You’ve spent hours rolling on a fresh coat of color, only to step back and notice a ragged line where your ceiling meets the wall, or a streak of white trim paint dragged across your newly painted surface. Learning how to paint ceilings, trim, and baseboards cleanly is the difference between a professional-looking finish and a frustrating redo. The good news? With the right sequence, tools, and techniques, you can get razor-sharp lines every single time – no professional painter required.
Why Painting Order Matters More Than You Think

Before you crack open a single can, you need to understand the golden rule of interior painting: always work from the top down.
That means ceilings first, walls second, and trim and baseboards last. This order exists for a reason. Paint drips. Rollers splatter. Brushes flick. When you paint in the correct sequence, any accidental marks land on a surface you haven’t painted yet – so you fix them during the next step, not after.
Skipping this rule is the single most common mistake DIY painters make. It turns a one-weekend project into a two-weekend headache.
The correct painting order:
- Ceiling
- Walls
- Trim (door frames, window casings, crown molding)
- Baseboards
How to Paint Ceilings Without Getting Paint on the Walls
Gather Your Ceiling Painting Tools
You don’t need a lot of gear, but you do need the right gear. Using the wrong brush or roller on a ceiling is a fast track to drips, spatters, and sore arms.
Essential tools for ceiling painting:
- Angled sash brush (2.5–3 inch) for cutting in along edges
- 9-inch roller with a 3/8-inch nap for flat ceilings
- Extension pole (at least 4 feet) to keep your feet on the ground
- Drop cloths – canvas, not plastic, which slides around
- Painter’s tape (optional – more on this below)
How to Cut In Along the Ceiling Line
“Cutting in” means painting a freehand band along the edge where the ceiling meets the wall before you roll the main field. This is the skill that separates clean results from messy ones.
Load your angled brush with paint, then wipe off the excess on the rim of the can. You want the bristles damp, not dripping. Hold the brush like a pencil – not a hammer – and press the bristles gently against the ceiling surface, guiding the bristle tips right to the edge.
Pro tips for a clean ceiling cut-in:
- Keep a damp rag in your non-dominant hand to wipe mistakes immediately
- Work in 12–18 inch strokes, maintaining a “wet edge” to prevent lap marks
- Cut in the entire room before rolling – don’t stop halfway
- Use a paint shield (a wide plastic or metal edger tool) against the wall if you’re not confident freehanding
Rolling the Ceiling
Once the cut-in band is complete and slightly tacky – not wet – start rolling.
Work in 3×3-foot sections, rolling in a “W” or “M” pattern to distribute paint evenly before filling in. Always roll back through wet paint to smooth out lines. Keep the roller slightly away from the cut-in band so you don’t overlap and create a thick ridge.
Important: Use ceiling-specific paint when possible. It’s thicker and more resistant to dripping, which matters a lot when you’re working overhead.
How to Paint Trim and Baseboards Like a Pro
Trim and baseboards are where most DIYers lose patience – and where the mess happens. But this stage is entirely controllable with the right prep and technique.
Should You Tape or Cut In Freehand?
This is the great debate of DIY painting. Here’s the honest answer: painter’s tape is only as good as your application.
Poorly applied tape bleeds paint underneath and creates its own jagged line. If you press the tape down firmly – using a putty knife or a credit card edge to really seal it – you’ll get crisp results. If you just press it with your fingers and call it done, you’ll get bleed.
When to use tape:
- Along freshly painted walls you don’t want to risk
- For high-gloss trim paint, which bleeds more than flat paint
- When you’re a beginner and freehanding feels stressful
When to skip tape:
- When you’re confident with a sash brush
- On surfaces with texture (tape won’t seal against texture)
- When the wall paint is bone dry and any drip can be wiped off
Preparing Trim and Baseboards
Don’t skip this step. Trim takes abuse – scuffs, chips, door dings, furniture marks. Paint over a rough surface and it will look rough.
Trim prep checklist:
- Sand lightly with 120-grit sandpaper, then 220-grit for final smoothness
- Wipe down with a tack cloth or slightly damp rag to remove dust
- Fill nail holes or dents with lightweight spackle – sand flush when dry
- Apply a thin coat of wood primer if bare wood is exposed or the previous color was very dark
Painting Trim Step by Step
| Step | Action | Why It Matters |
| 1 | Sand and clean all trim surfaces | Ensures paint adhesion and a smooth finish |
| 2 | Apply painter’s tape to adjacent walls | Protects already-painted walls |
| 3 | Apply a thin first coat with an angled brush | Thin coats prevent drips and brush marks |
| 4 | Let dry fully (2–4 hours for latex) | Prevents pulling up the first coat |
| 5 | Lightly sand with 220-grit between coats | Knocks down any raised grain or dust nibs |
| 6 | Apply second coat | Achieves full coverage and an even sheen |
| 7 | Remove tape at 45-degree angle while still slightly tacky | Prevents peeling the dried paint film |
Use a semi-gloss or gloss finish for trim and baseboards. These finishes are durable, scrubbable, and they reflect light in a way that makes the trim “pop” against the wall.
How to Paint Baseboards Without Getting Paint on the Floor or Walls
Baseboards are the most tedious part of the project – you’re working low to the ground, the target is narrow, and there are two surfaces on either side that you don’t want to touch.
Protect the Floor First
Slide painter’s tape along the floor right against the bottom edge of the baseboard. For hardwood or tile, this is non-negotiable. For carpet, you can tuck a thin paint shield or a flexible putty knife blade under the baseboard edge and paint right over it as you move along.
The Right Brush for Baseboards
Use a 2-inch angled sash brush – no bigger. A larger brush is harder to control in a tight space and more likely to drag against the wall above or the floor below.
Load the brush lightly. Baseboards are narrow and any excess paint will drip straight down to the floor.
Baseboard painting technique:
- Start each stroke from a dry area, pulling into a wet edge (this is called “laying off”)
- Paint the top edge of the baseboard first, then the face, then the bottom edge
- Work in 2-foot sections so paint doesn’t dry before you can blend it
- Keep a damp rag and a cotton swab handy – the swab is perfect for cleaning up paint that sneaks into the corner where the baseboard meets the wall
How to Get Clean Paint Lines Every Time
This is the section that solves the most common problem: blurry, jagged, or bled lines between surfaces.
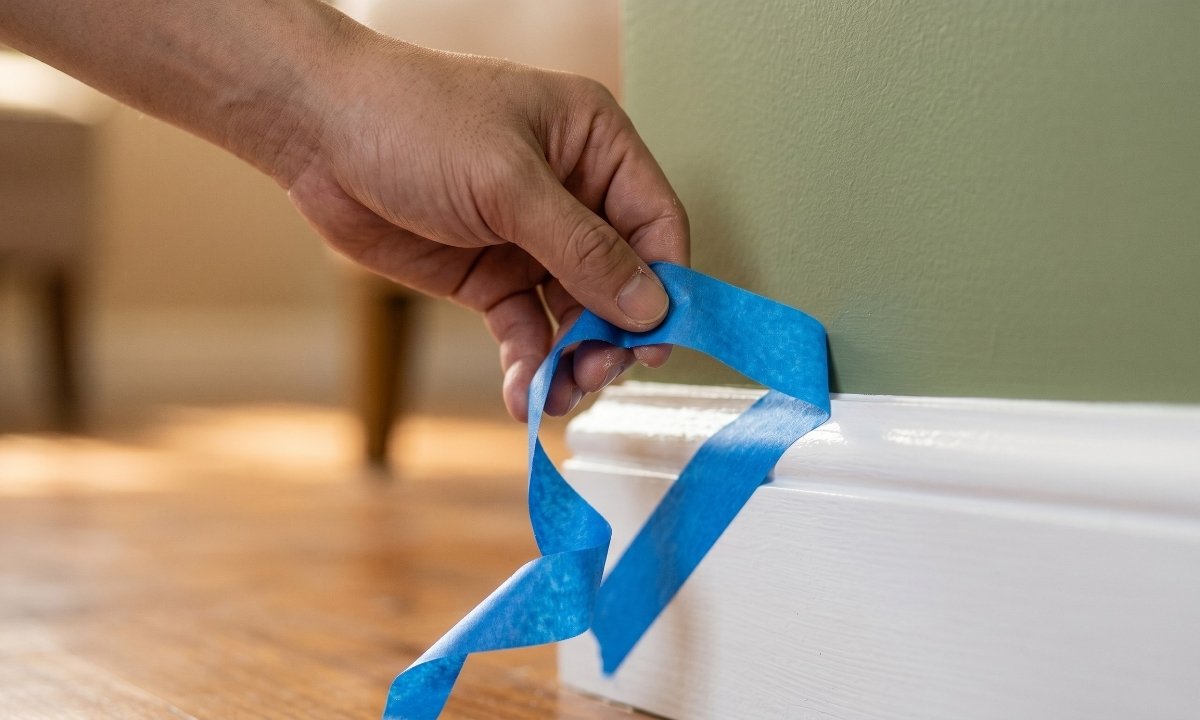
Use the Right Tape (and Apply It Right)
ScotchBlue Painter’s Tape and Frog Tape are the two most trusted brands. Frog Tape uses a patented PaintBlock technology that reacts with latex paint to form a micro-barrier at the edge – it’s worth the extra cost for tricky edges.
Apply tape in short sections (12–18 inches), pressing firmly as you go. Use your fingernail or a putty knife to burnish the edge that faces the paint. That edge is the seal – it must be perfect.
The Caulk Trick for Perfectly Sharp Lines
Here’s a trick most tutorials skip: after applying tape, run a thin bead of clear paintable caulk along the tape edge, then smooth it with your finger. When the caulk dries, it creates a physical barrier that paint physically cannot bleed through.
This is the same technique professional painters use on trim against textured walls, where tape alone will always leak.
Remove Tape at the Right Moment
Pull tape off while the final coat is still slightly tacky – usually 1–2 hours after painting, not the next day. If you wait until the paint is completely cured, it will bond to the tape and peel off in chunks when you remove it.
Pull at a 45-degree angle, back over itself, slowly and steadily.
Common Ceiling and Trim Painting Mistakes to Avoid
Even experienced DIYers fall into these traps. Knowing them in advance saves hours of correction work.
- Skipping primer on bare wood trim – paint soaks in unevenly and looks patchy
- Using flat paint on trim – flat finishes scratch easily and can’t be wiped down
- Painting over dirty surfaces – grease and dust prevent adhesion; paint will peel within weeks
- Rolling too close to the ceiling cut-in before it dries – creates a visible overlap ridge
- Rushing between coats – latex paint needs at least 2 hours dry time; oil-based needs 24 hours
- Using the same brush on ceiling and trim – brush fibers hold paint memory and transfer texture

FAQ: Painting Ceilings, Trim & Baseboards
Q: Do I need to use different paint for ceilings, walls, and trim?
Yes, and it matters more than most people realize. Ceiling paint is formulated to be thicker and spatter-resistant, and it typically dries to a flat finish to hide imperfections. Wall paint comes in a range of sheens (eggshell and satin are most popular). Trim paint should be semi-gloss or gloss for durability and ease of cleaning. Using ceiling paint on your trim, for example, will result in a finish that scuffs and marks easily.
Q: How do I avoid lap marks when painting ceilings?
Lap marks happen when you roll over paint that has already begun to dry. The key is to maintain a wet edge at all times – never let the leading edge of your painted section dry before you continue rolling into it. Work in sections, keep a fast pace, and avoid stopping mid-ceiling if possible. Adding a paint extender (also called a flow additive) to your ceiling paint gives you more working time.
Q: Is painter’s tape actually necessary for trim and baseboards?
Not always. Experienced painters cut in freehand along trim using an angled sash brush and get clean results without any tape. However, if your walls are freshly painted or you’re working with high-gloss trim paint (which is more fluid and likely to bleed), tape is worth the extra 20 minutes it takes to apply properly. The key is pressing the tape edge down firmly – loosely applied tape is worse than no tape.
Q: How long should I wait between coats on trim?
For water-based latex trim paint, wait at least 2 hours between coats – longer in humid conditions. For oil-based trim paint, wait a full 24 hours. Rushing between coats traps moisture under the new layer, which can cause bubbling, peeling, or a cloudy finish. When in doubt, touch the surface – if it feels even slightly tacky, wait longer.
Q: What’s the best way to fix a paint bleed under the tape?
If paint has bled under your tape, don’t panic. Let the paint dry completely, then use a razor blade or craft knife to score along the tape edge before removing it. Any bleed can be touched up with a small artist’s brush and a tiny amount of the correct wall color. For future projects, try Frog Tape or use the caulk sealing trick described above – it virtually eliminates bleed entirely.
Conclusion: A Clean Finish Is All About Sequence and Patience
Painting ceilings, trim, and baseboards cleanly isn’t about talent – it’s about following the right order, using the right tools, and giving each step the time it needs. Work top to bottom. Cut in before you roll. Prep your surfaces properly. Apply tape with intention, or skip it entirely and cut in with a steady hand. Use the right sheen for each surface.
Follow this process and you’ll end the weekend with walls that look like a professional crew spent two days in your home – not like a frantic Saturday afternoon project.
Ready to take on your next painting project with confidence? Visit Caleb’s Creations for more expert DIY guides, product recommendations, and step-by-step tutorials built for real homeowners who want real results.